如何在Debian上安装Nginx
介绍
Nginx是世界上最受欢迎的Web服务器之一,负责托管互联网上一些最大和流量最高的网站。在大多数情况下,它比Apache更资源友好,可以用作Web服务器或反向代理。
在本指南中,我们将讨论如何在 Debian 10 服务器上安装 Nginx。
先决条件
在开始本指南之前,你应该有一个配置了 sudo 权限的常规非 root 用户和激活防火墙的服务器。可以通过遵循 Debian 10 的初始服务器设置指南来学习如何设置。
当你有可用的账户时,以非 root 用户身份登录以开始使用。
步骤1 - 安装Nginx
因为 Nginx 在 Debian 的默认仓库中可用,所以可以使用包管理器apt从仓库中安装它。
由于这是我们在本会话中与系统的第一次交互,因此让我们首先更新本地包索引,以便我们可以访问最新的包列表:
1 | sudo apt update |
我们现在开始安装:nginx
1 | sudo apt install nginx |
当系统提示你确认安装时,按Y键继续,将 Nginx 和任何必需的依赖项安装到你的服务器上。
步骤 2 – 调整防火墙
在测试Nginx之前,需要调整防火墙软件以允许访问该服务。
查看ufw已知应用集成,方法是键入:
1 | sudo ufw app list |
你应该会获得应用程序配置文件的列表如下:
1 | Output |
如你所见,Nginx有三种配置文件可用:
- Nginx Full:此配置文件同时打开
80端口(正常,未加密的Web流量)和443端口(TLS / SSL加密流量) - Nginx HTTP:此配置文件仅打开
80端口(正常,未加密的Web流量) - Nginx HTTPS:此配置文件仅打开
443端口(TLS / SSL加密流量)
建议你启用限制性最强的配置文件,该配置文件仍将允许已配置的流量。由于在本指南中我们尚未为服务器配置SSL,因此我们只需要在端口上允许HTTP的流量。
你可以通过键入以下内容来启用此功能:
1 | sudo ufw allow 'Nginx HTTP' |
你可以通过键入以下内容来验证更改:
1 | sudo ufw status |
你应该会在显示的输出中看到允许的 HTTP 流量:
1 | Output |
步骤 3 – 检查 Web 服务器
在安装过程结束后,Debian 10 会启动 Nginx。Web 服务器应该已经启动并正在运行。
我们可以使用 init 系统进行检查,以确保服务正在运行,方法是键入:
1 | systemctl status nginx |
1 | Output |
如上所示,该服务似乎已成功启动。但是,测试是否成功的最佳方法是从Nginx实际请求一个页面。
你可以访问默认的Nginx页面,通过浏览器输入服务器的IP地址来确认软件是否正常运行。如果你不知道服务器的 IP 地址,请尝试在服务器的命令提示符处键入以下内容:
1 | ip addr show eth0 | grep inet | awk '{ print $2; }' | sed 's/\/.*$//' |
当你拥有服务器的 IP 地址时,请将其输入到浏览器的地址栏中:
1 | http://your_server_ip |
你应该会看到默认的Nginx登录页面:
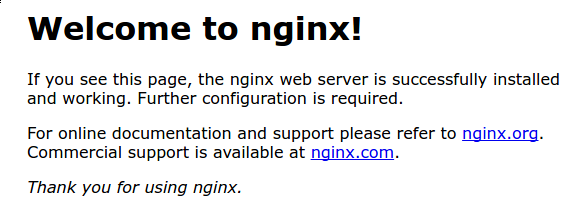
此页面是Nginx的默认主页,以向你显示服务器是否正常运行。
步骤4 - 管理Nginx进程
现在,Web 服务器已启动并运行,让我们回顾一些基本的管理命令。
要停止 Web 服务器,请键入:
1 | sudo systemctl stop nginx |
要启动 Web 服务器,请键入:
1 | sudo systemctl start nginx |
要重启 Web 服务器,请键入:
1 | sudo systemctl restart nginx |
如果只是进行配置更改,Nginx通常可以在不断开连接的情况下重新加载。为此,请键入:
1 | sudo systemctl reload nginx |
默认情况下,Nginx会开机自启。如果这不是你想要的,则可以通过键入以下内容来禁用此行为:
1 | sudo systemctl disable nginx |
要重新启用开机自启,可以键入:
1 | sudo systemctl enable nginx |
步骤 5 – 设置服务器块
使用Nginx作为Web服务器时,服务器块(类似于Apache中的虚拟主机)可用于封装详细配置信息并在单个服务器上托管多个域。我们将设置一个名为 your_domain 的域。
Debian 10 上的 Nginx 默认启用了一个服务器块,该服务器块会读取位于/var/www/html下的Web页面。虽然这适用于单个站点,但如果你托管多个站点,则可能会变得难以管理。与其修改默认的页面,不如为 your_domain 网站创建一个新的Web目录,如果客户端请求与任何其他站点不匹配,才访问这个默认的网站页面/var/www/html。
按如下所示创建 your_domain 网站,使用标志-p创建任何必需的父目录:
1 | sudo mkdir -p /var/www/your_domain/html |
接下来,使用环境变量分配目录的所有权,$USER变量应引用你当前的系统用户:
1 | sudo chown -R $USER:$USER /var/www/your_domain/html |
如果你尚未修改umask值,则 Web 根的权限应该是正确的,但你可以通过键入以下内容来确保:
1 | sudo chmod -R 755 /var/www/your_domain |
接下来,使用你喜欢的编辑器创建示例页面:
1 | nano /var/www/your_domain/html/index.html |
在里面添加以下示例:
1 | <html> |
完成后保存并关闭该文件。
为了让Nginx显示这些内容,我们需要创建一个服务器块,其中包含指向我们的网站目录的正确指令。与其直接修改默认配置文件,不如新增一个/etc/nginx/sites-available/your_domain的网站配置:
1 | sudo nano /etc/nginx/sites-available/your_domain |
粘贴以下配置块,该配置块类似于默认配置,但针对我们的新网站目录和域名进行了更新:
1 | server { |
注意看,我们用root设置了新的根目录,并用server_name更新了我们的域名。
然后让我们通过建立一个软链接把 sites-available 的配置指向 sites-enabled 来启用此服务器块,Nginx在启动的时候会从sites-enabled目录读取网站配置:
1 | sudo ln -s /etc/nginx/sites-available/your_domain /etc/nginx/sites-enabled/ |
接下来,进行测试以确保Nginx文件中没有语法错误:
1 | sudo nginx -t |
如果没有任何问题,你将看到以下输出:
1 | Output |
配置测试通过后,重新启动Nginx以应用你的更改:
1 | sudo systemctl restart nginx |
现在你应该可以通过http://your_domain来访问到刚才新建的网页内容了:

步骤6 - 熟悉重要的Nginx文件和目录
现在你已经知道如何管理Nginx服务器,还应该花几分钟时间熟悉一些重要的目录和文件。
网页内容
/var/www/html:实际的Web内容,默认情况下仅由你之前看到的默认Nginx页面组成,从网站根目录中提供。这可以通过更改Nginx配置文件来更改。
服务器配置
/etc/nginx:Nginx 配置目录。所有Nginx配置文件都在这里。/etc/nginx/nginx.conf:主Nginx配置文件。可以对此进行修改以更改Nginx全局配置。/etc/nginx/sites-available/:可以存储每个站点服务器块的目录。Nginx不会使用在此目录中找到的配置文件,除非它们链接到sites-enabled目录。通常,所有服务器块配置都在此目录中完成,然后通过链接到其他目录来启用。/etc/nginx/sites-enabled/:存储已启用的站点服务器块的目录。通常,它们是通过链接sites-available目录中的配置文件来创建的。/etc/nginx/snippets:这个目录主要可以包含在其它Nginx配置文件中的配置片段, 重复的配置都可以重构为配置片段。
服务器日志
/var/log/nginx/access.log:对Web服务器的每个请求都默认记录在此日志文件中,除非你为Nginx配置了其他日志文件。/var/log/nginx/error.log:任何Nginx错误信息都将记录在此日志中。
完结
现在,你已经安装了 Web 服务器,你可以尽情地向互联网展示你的个人网站了。